
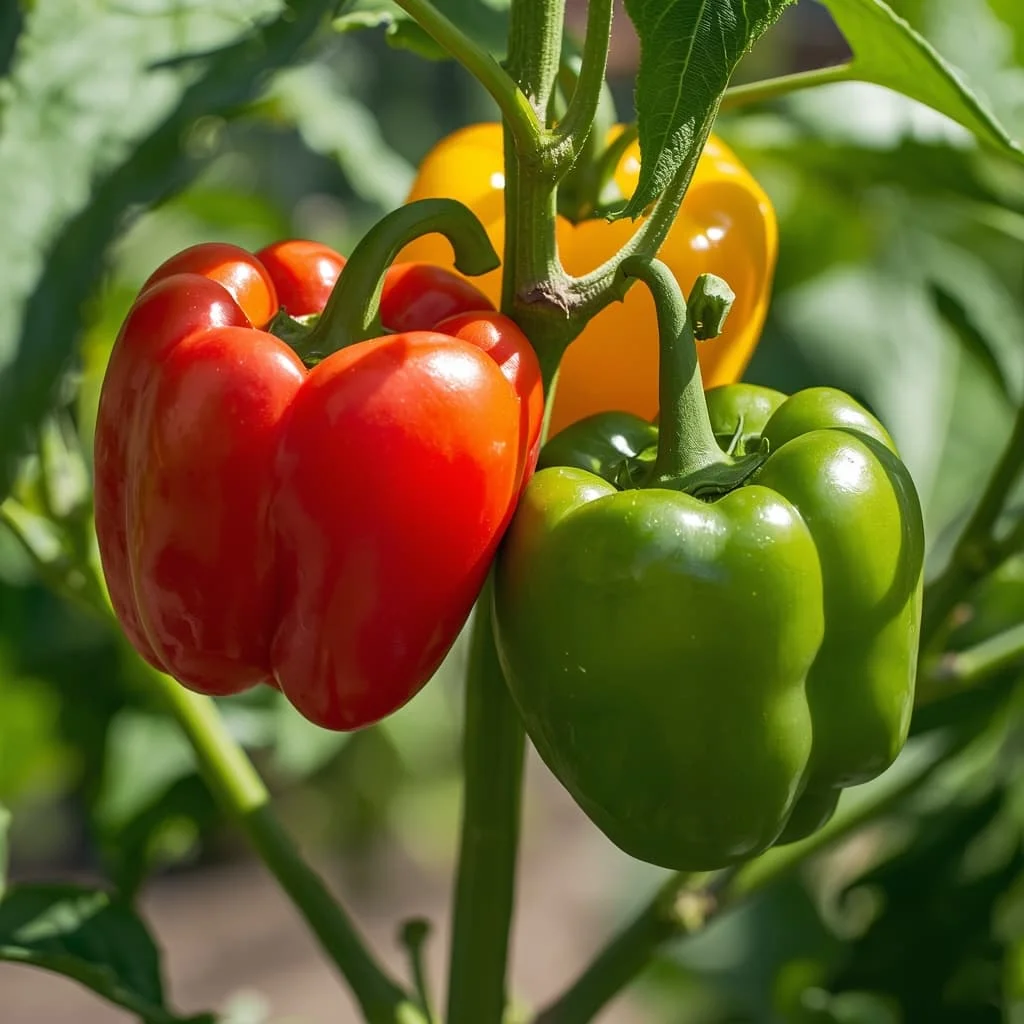
Bell Pepper Planting Guide: Everything a Beginner Needs to Know
Growing your own bell peppers is one of the most rewarding things you can do in a home garden. There’s something really special about walking outside, picking a bright red or yellow pepper off your own plant, and using it in dinner that same night. Once you get the hang of it, bell peppers are not as hard as people think. Yes, they need a little more attention than tomatoes or zucchini, but with the right setup, even a total beginner can grow a great crop.
This guide covers everything from picking the right seeds to harvesting your peppers at the perfect time. Whether you have a big backyard, a small raised bed, or just a few pots on a balcony, this guide will walk you through every step in plain, simple language. No complicated terms, no confusing advice just real, practical tips from someone who has spent years growing peppers and learning from mistakes.
Let’s get into it.
Why Grow Bell Peppers at Home?
A lot of people buy bell peppers at the store without thinking twice. But once you grow your own, it’s hard to go back.
Store-bought peppers are often picked before they’re fully ripe so they can survive the long trip from farm to store. That means they don’t have that deep, sweet flavor that a fully ripe, homegrown pepper has. When you grow your own, you can leave the pepper on the plant until it’s perfectly ripe. The difference in taste is huge.
Growing at home also saves money. Bell peppers — especially the red, yellow, and orange ones — can be expensive at the grocery store. A single plant can produce 6 to 10 peppers or more per season, and seeds cost almost nothing. If you plant several, you could have more peppers than you know what to do with. Bell Pepper Planting Guide will help you to get maximum yield.
Plus, you know exactly what went into growing them. No mystery pesticides, no chemicals you can’t pronounce. Just soil, water, sunlight, and your own effort.
Benefits of Growing Bell Peppers at Home
Bell peppers are good for you in so many ways. They’re loaded with vitamin C — actually more than most citrus fruits. They’re also rich in vitamin A, vitamin B6, potassium, and antioxidants. Red bell peppers have the most nutrients because they’ve had the longest time to ripen on the plant.
Growing them at home gives you:
- Fresh, flavorful peppers that taste nothing like what you get at the store
- Control over what goes on your food — you pick the fertilizer, you decide whether to spray anything
- A fun, low-cost hobby that can feed your family all summer long
- Better mental health — gardening is proven to reduce stress
- Fresh air and a reason to get outside every day
If you have kids, getting them involved in growing bell peppers is a great way to teach them about where food comes from and get them excited about eating vegetables. Bell Pepper Planting Guide will help you to get maximum yield.
Types of Bell Peppers You Can Grow
Bell peppers come in more varieties than most people realize. Here’s a simple breakdown of what’s out there:
Green Bell Peppers
Green bell peppers are just unripe versions of other colors. They have a slightly bitter, earthy flavor. They’re the cheapest to buy at stores because they take the least time to grow — you can pick them before they change color. Good varieties include California Wonder and Big Bertha.
Red Bell Peppers
Red peppers are green peppers that were left on the plant to fully ripen. They’re sweeter and have more vitamin C. They take longer to grow than green ones, but the flavor is worth the wait. Red peppers are some of the most popular for cooking and eating raw. Bell Pepper Planting Guide will help you to get maximum yield.
Yellow and Orange Bell Peppers
These have a mild, slightly fruity flavor and are great for salads and stir-fries. Varieties like Golden California Wonder and Orange Sun are popular choices. They also take a bit longer to ripen than green peppers.
Miniature or Baby Bell Peppers
These are smaller plants that work great in containers. They produce tons of tiny, sweet peppers. Mini Sweet Mix is one variety that’s popular with container gardeners.
Purple and Chocolate Bell Peppers
Yes, these exist! Chocolate Bell Peppers have a brownish-red color when ripe and a rich, sweet flavor. Purple varieties like Purple Beauty are fun to grow but tend to turn green when cooked.
When you’re starting out, California Wonder Red or California Wonder Green are great beginner choices. They’re reliable, produce well, and are easy to find at seed stores.
Climate and Best Planting Time
Bell peppers love heat. They’re originally from Central and South America, so they’re built for warm, sunny weather. If you try to grow them in cold soil or plant them too early in the spring, they’ll just sit there doing nothing — or worse, they’ll die. Bell Pepper Planting Guide will help you to get maximum yield.
Ideal Temperatures
Bell peppers grow best when daytime temperatures are between 70°F and 85°F (21°C to 29°C). At night, they like it no cooler than 55°F (13°C). If temperatures drop below 50°F (10°C), the plants can get stressed and may drop their flowers, which means no peppers.
Anything over 95°F (35°C) is too hot for pollination. In extreme heat, flowers often fall off without setting fruit.
When to Plant
The timing depends on where you live, but here are the general rules:
Start seeds indoors: 8 to 10 weeks before your last expected frost date. So if your last frost is around April 15, you’d start seeds indoors around early February.
Transplant outdoors: Only after all frost danger has passed AND nighttime temps are consistently above 55°F. This is usually late April to early June depending on your zone.
In warm climates (zones 9–11): You can sometimes grow peppers almost year-round.
In cooler climates: Focus on heat-loving varieties and use black plastic mulch to warm the soil faster in spring.
If you’re not sure of your last frost date, look it up by zip code or postal code online — it takes about 30 seconds and is really helpful for planning. Bell Pepper Planting Guide will help you to get maximum yield.
Soil Preparation: This Part Really Matters
If there’s one thing that makes the biggest difference in how your bell peppers grow, it’s the soil. Good soil means healthy roots, healthy roots mean healthy plants, and healthy plants mean lots of peppers.
What Bell Peppers Need in Their Soil
Bell peppers like soil that:
- Drains well (roots hate sitting in water)
- Holds some moisture (but not too much)
- Has a pH between 6.0 and 6.8 (slightly acidic)
- Is rich in organic matter
Heavy clay soil is bad for peppers because it stays too wet. Sandy soil drains too fast and doesn’t hold nutrients. The goal is something in between — a loose, loamy soil that’s dark and crumbly.
How to Prepare Your Garden Bed
Start by loosening the soil to a depth of about 12 inches (30 cm). Use a garden fork or a tiller if you have one. This lets the roots spread out easily.
Next, mix in a generous amount of compost. You want to add about 2 to 4 inches of compost and work it into the top 8 to 10 inches of soil. Compost adds nutrients, improves drainage, and feeds the beneficial microbes in your soil that help plants absorb food.
If your soil is very heavy or clay-like, you can also mix in some perlite or coarse sand to help it drain better. Bell Pepper Planting Guide will help you to get maximum yield.
Checking Your Soil pH
You can buy a simple soil pH test kit at any garden store for just a few dollars. If your soil is too acidic (below 6.0), add garden lime to raise it. If it’s too alkaline (above 7.0), add sulfur to lower it.
Testing your soil might seem like an extra step, but peppers really are sensitive to pH. If the pH is off, they can’t properly absorb nutrients even if those nutrients are in the soil. It’s worth the 10 minutes.
Adding Fertilizer Before Planting
Before you plant, it helps to work a balanced slow-release fertilizer into the soil. Something like a 10-10-10 or 5-10-10 fertilizer (those numbers refer to nitrogen, phosphorus, and potassium content) is a good starting point. Follow the label directions for how much to use. Bell pepper planting guide will make you wise farmer.
The slightly higher phosphorus in a 5-10-10 mix helps with root development and flowering — both important for pepper plants. Bell Pepper Planting Guide will help you to get maximum yield.
Starting Seeds Indoors
Bell peppers need a long growing season — usually 70 to 90 days from transplant to harvest, and seeds take 10 to 14 days just to germinate. That’s why you start them indoors weeks before the last frost. Bell pepper planting guide give you premium knowledge.
What You’ll Need
- Seed starting trays or small pots
- Seed starting mix (not regular potting soil — it’s too heavy)
- Bell pepper seeds
- A heat mat (very helpful but not required)
- Grow lights or a very sunny south-facing window
Step-by-Step Seed Starting
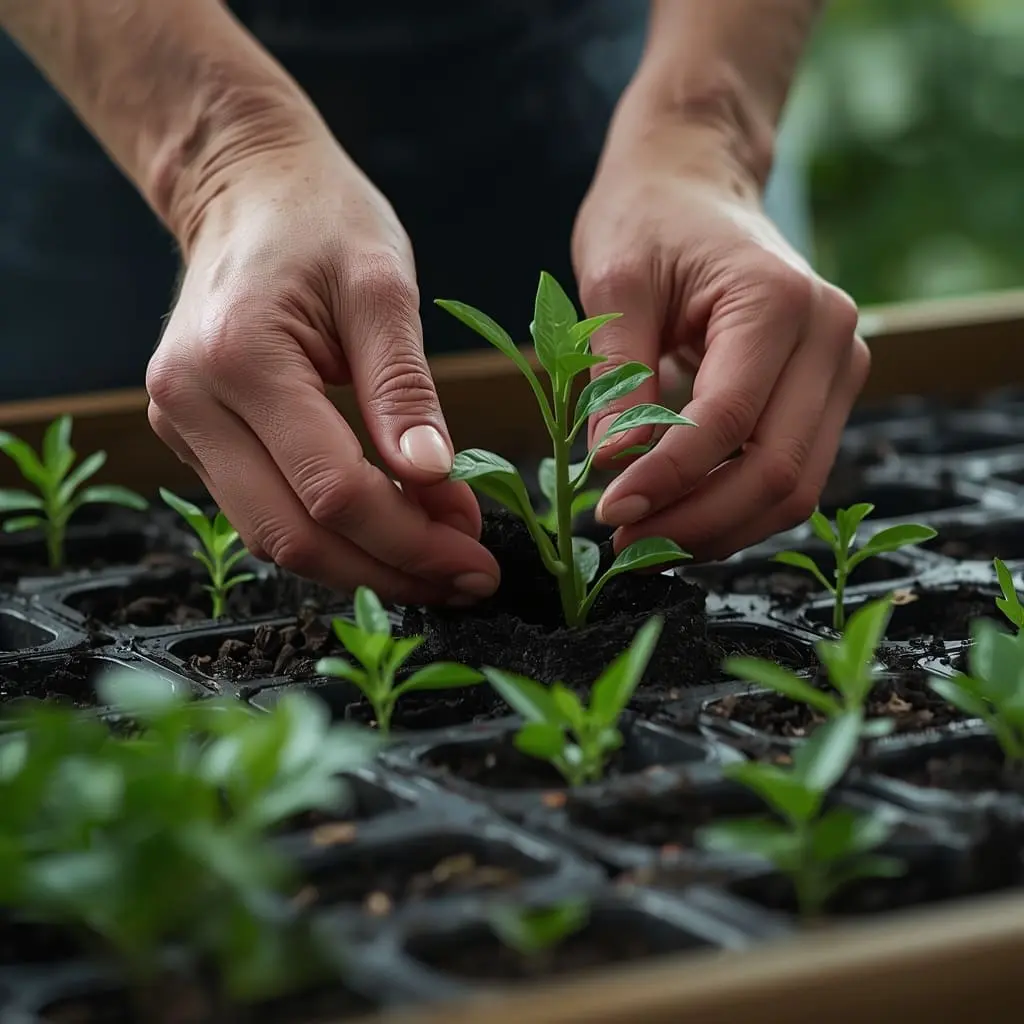
Step 1: Fill your trays with moist seed starting mix. You want it damp, not soaking wet. Squeeze a handful — just a few drops of water should come out.
Step 2: Plant seeds about ¼ inch (6mm) deep. You can plant 2 to 3 seeds per cell in case some don’t sprout.
Step 3: Cover the trays loosely with plastic wrap or a humidity dome to hold in moisture.
Step 4: Place on a heat mat or in a warm spot. Bell pepper seeds germinate best at soil temperatures of 80°F to 90°F (27°C to 32°C). At room temperature they’ll sprout, but it takes much longer.
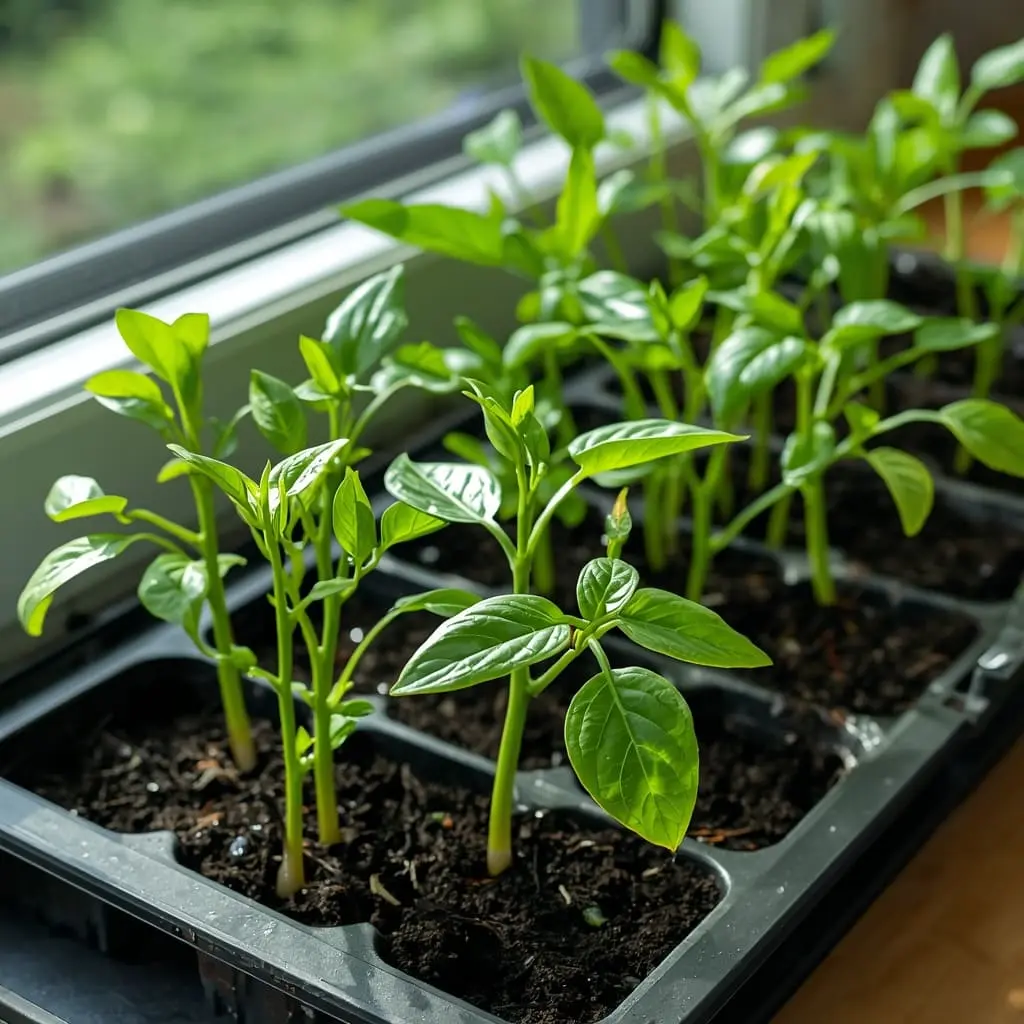
Step 5: Check daily. Keep the soil moist but not waterlogged. As soon as you see sprouts poking up — usually within 7 to 14 days — remove the plastic wrap.
Step 6: Move the seedlings under grow lights or to your sunniest window. They need 14 to 16 hours of light per day. A south-facing window may not give enough light — most beginners underestimate how much light seedlings need. Bell Pepper Planting Guide will help you to get maximum yield.
Step 7: Once seedlings have two sets of real leaves, thin to one per cell by snipping the extras with scissors (don’t pull them — it can disturb the roots of the keeper).
Step 8: Water consistently but let the top of the soil dry slightly between waterings. Overwatering is the number one killer of seedlings.
Hardening Off
About a week before transplanting, you need to “harden off” your seedlings. This just means getting them used to outdoor conditions gradually.
Start by putting them outside in a sheltered, shady spot for just 1 to 2 hours on day one. Each day, increase the time outside and slowly introduce more sunlight. By the end of a week, they should be able to handle full sun for most of the day. Skip this step and your plants can go into shock when you move them to the garden — leaves turn white or curl and the plant just sits there struggling. Bell pepper planting guide help you to increase your yield.
Transplanting Bell Peppers Outdoors
Once your seedlings are hardened off and the weather is reliably warm, it’s time to plant them in the garden.
Choosing the Right Spot
Pick a spot that gets at least 6 to 8 hours of full sun per day. South-facing spots are ideal. Avoid areas that flood after rain or that are shaded by trees or fences.
Spacing ( Bell Pepper Planting Guide )
Plant bell peppers 18 to 24 inches (45 to 60 cm) apart. If you’re planting in rows, keep rows about 2 to 3 feet (60 to 90 cm) apart. Good spacing means good air circulation, which helps prevent disease.
How to Transplant
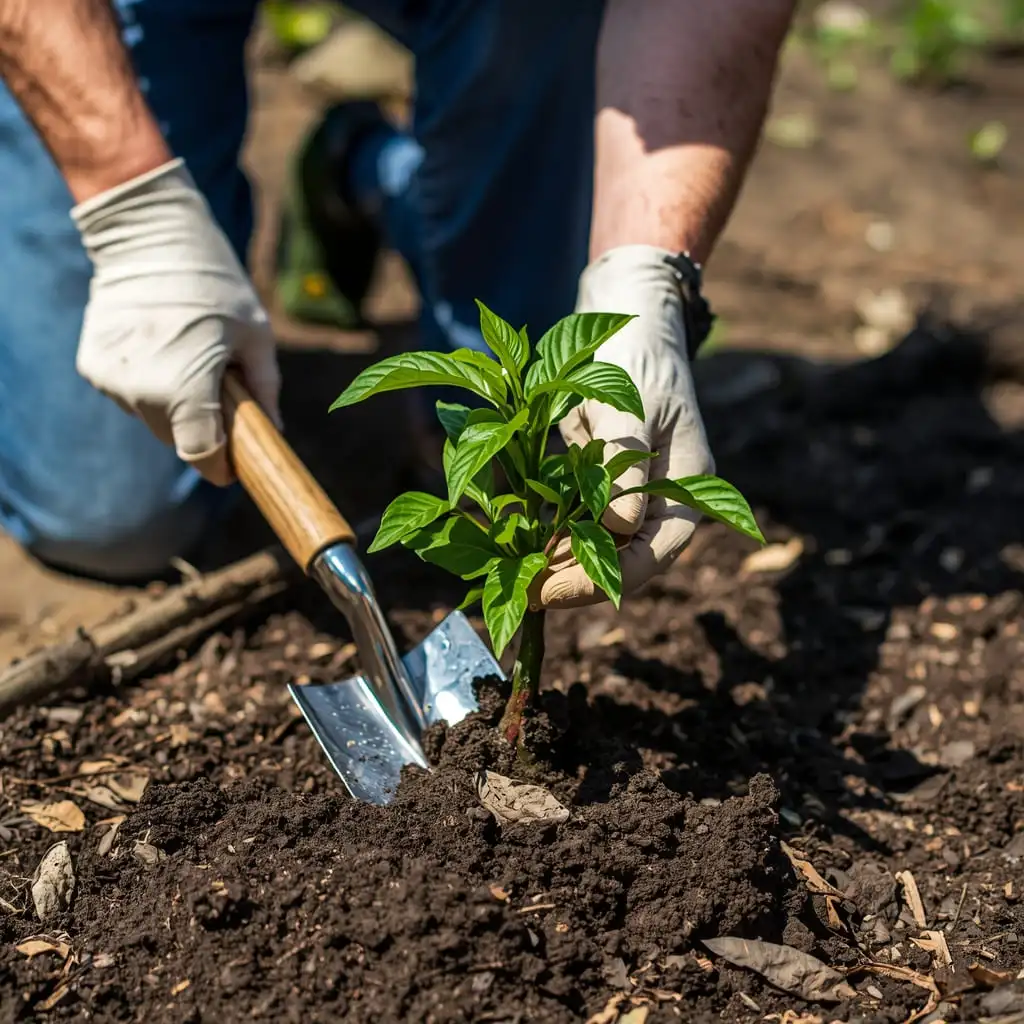
Dig a hole slightly bigger than the root ball of your seedling. Remove the seedling from its pot carefully — tip it upside down and let it slide out, don’t yank it by the stem.
Plant it at the same depth it was in the pot. Unlike tomatoes, you don’t bury pepper stems deeper — it doesn’t help them and can actually hurt the plant.
Firm the soil gently around the roots and water right away with a gentle stream. Add a layer of mulch around the base of the plant (but not touching the stem) to help hold moisture and keep weeds down. Bell Pepper Planting Guide will help you to get maximum yield.
Give Them a Boost
Some gardeners like to add a diluted liquid fertilizer right at transplant time to help the roots settle in. A diluted fish emulsion or starter fertilizer works well.
Growing Bell Peppers in Containers
Don’t have a yard? No problem. Bell peppers grow really well in pots and containers, and you can put them on a patio, balcony, rooftop, or even a sunny driveway.
Container Size
This is important. Go too small and the plant will be stressed, produce fewer peppers, and need constant watering. Bell peppers need at least a 5-gallon pot, and 10 gallons is even better. Bigger pots hold more water and nutrients and tend to give bigger harvests. Bell Pepper Planting Guide will help you to get maximum yield.
Drainage Is Critical
Whatever container you use, make sure it has drainage holes at the bottom. No drainage = root rot, and root rot = dead plant. If you’re using a decorative pot without holes, put a plain plastic pot with holes inside it.
Potting Mix
Use a high-quality potting mix — not garden soil, which compacts in containers and doesn’t drain well. Add a slow-release fertilizer to the mix at planting time.
Watering in Containers
Containers dry out much faster than garden beds. During hot summer days, you might need to water container peppers once or even twice a day. Stick your finger into the soil — if the top inch is dry, it’s time to water. Always water until it comes out the drainage holes.
Moving Containers
One of the biggest advantages of containers is that you can move them. If a heat wave hits and temps go above 95°F, move the pots to a slightly shadier spot during the hottest part of the day. If an unexpected cold snap is coming, bring them inside. Bell Pepper Planting Guide will help you to get maximum yield.
Watering Guide for Bell Peppers
Bell peppers need consistent moisture — not too wet, not too dry. Think of it like Goldilocks. Inconsistent watering leads to problems like blossom end rot and cracked peppers.
How Often to Water
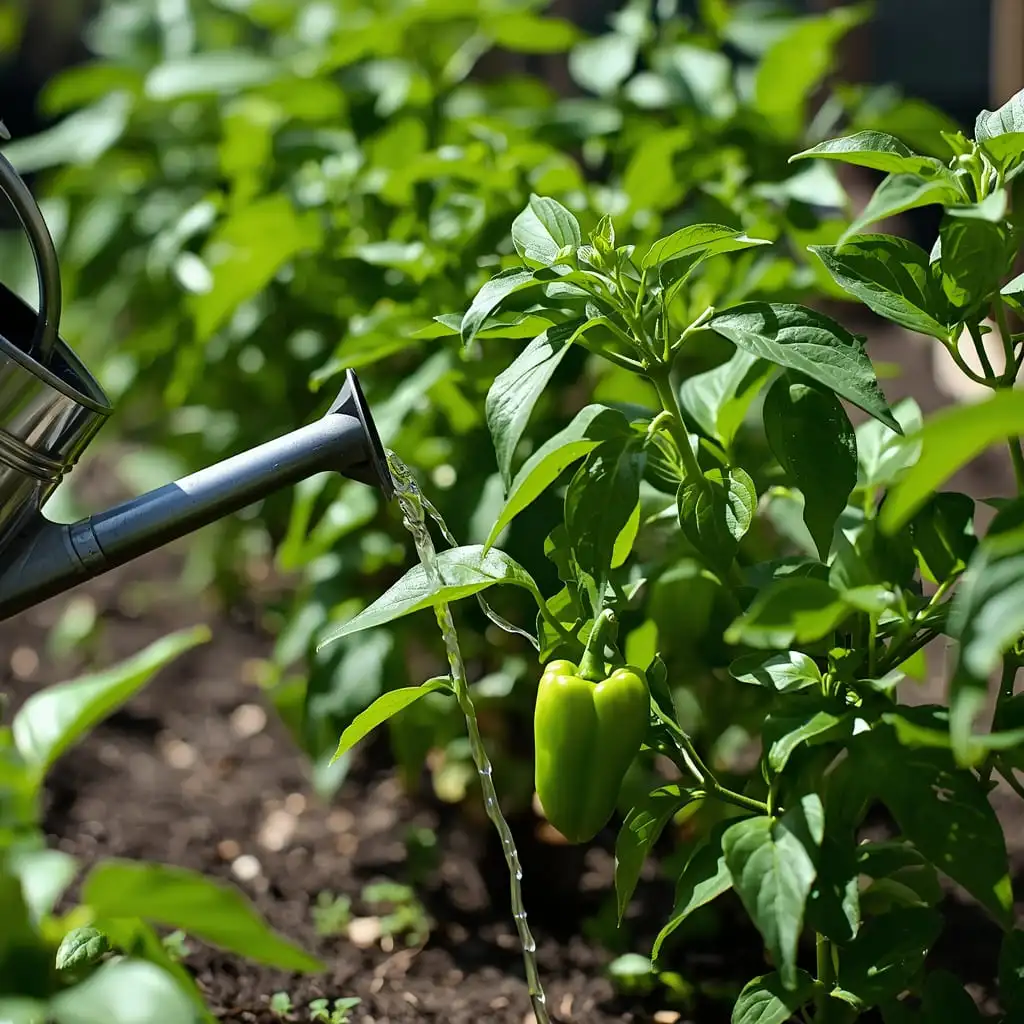
In garden beds, watering deeply 1 to 2 times per week is usually enough. Each watering should soak the soil to at least 6 inches deep so the roots can follow the water downward.
In very hot or dry weather, you may need to water every other day.
How to Water
Always water at the base of the plant, not on the leaves. Wet leaves can encourage fungal diseases. A drip irrigation system or soaker hose is ideal — it delivers water right to the roots without wetting foliage.
Morning is the best time to water. That way, any moisture that does get on leaves has time to dry off before evening.
Signs of Overwatering
- Leaves turning yellow, especially lower ones
- Soil constantly soggy
- Plant looks droopy even though the soil is wet
Signs of Underwatering
- Plant wilts during the hottest part of the day and doesn’t recover in the evening
- Leaves look dull or curled
- Soil is bone dry an inch or two down
A layer of mulch around your plants — straw, wood chips, or shredded leaves — can cut watering needs by up to 50% by reducing evaporation.
Fertilizing and Feeding Bell Peppers
Bell peppers are what gardeners call “heavy feeders.” They need a steady supply of nutrients throughout the growing season. But there’s a right way and a wrong way to fertilize.
Before Planting
Mix a balanced, slow-release fertilizer or compost into the soil before planting. This gives the plants a good foundation.
During Vegetative Growth (First Few Weeks After Transplanting)
During the first few weeks, the plant is focused on growing leaves and stems. At this point, a fertilizer with more nitrogen is helpful. Nitrogen is the first number on the fertilizer bag (like 10-10-10 or 12-6-6). It promotes leafy green growth.
Apply a liquid fertilizer every 2 weeks during this phase.
When Flowers Appear
Once you see flowers forming, switch to a fertilizer that’s lower in nitrogen and higher in phosphorus and potassium. Something like a 5-10-10 or tomato fertilizer works well. Too much nitrogen at this stage makes the plant put its energy into leaves instead of fruits.
Some gardeners add a little Epsom salt (about 1 tablespoon per gallon of water) once or twice during the season. Epsom salt provides magnesium, which helps with fruit development and keeps leaves green. It’s optional, but some people swear by it.
Side Dressing
Halfway through the season, you can “side dress” your plants by sprinkling a handful of compost or granular fertilizer around the base of each plant and working it lightly into the soil. Don’t get it on the leaves or stem. Bell Pepper Planting Guide will help you to get maximum yield.
What NOT to Do
Don’t over-fertilize. Too much fertilizer — especially too much nitrogen — causes a problem called “too much green, not enough fruit.” The plant grows huge and beautiful but produces very few peppers. Always follow the label directions. Bell pepper planting guide helps beginners grow healthy peppers at home.
Sunlight Needs
Bell peppers are sun-lovers. They need a minimum of 6 hours of direct sunlight per day, but 8 or more hours is ideal.
Less sun means slower growth, fewer flowers, and less fruit. If your pepper plants are in a spot that gets only partial sun, they’ll survive but won’t thrive.
If you’re gardening in a very hot climate where summer temperatures regularly hit 95°F or above, a little afternoon shade can actually help. Too much intense heat can cause flowers to drop before they can set fruit.
If you’re growing indoors or in a low-light space, you’ll need to supplement with grow lights. Full-spectrum LED grow lights placed 4 to 6 inches above the plants for 14 to 16 hours a day work well. Choose a sunny location with at least 6 to 8 hours of direct sunlight.
Supporting Bell Pepper Plants
Bell pepper plants aren’t as tall as tomatoes, but they do get top-heavy once loaded with fruit. A plant with several large peppers can bend or even break at the stem if it’s not supported. Plant bell pepper seeds in warm soil after the last frost date.
Using Stakes
A simple bamboo stake pushed into the soil near the base of the plant and tied loosely with soft twine or garden tape works great. Use a figure-8 pattern when tying — one loop around the stake, one around the stem — so you don’t cut into the stem. This bell pepper planting guide makes growing peppers easy and successful.
Using Cages
Tomato cages also work well for peppers, especially for larger varieties. Place the cage over the plant when it’s young and it will grow up through the cage naturally.
When to Support
Start supporting your plants early — before they get too big. It’s much easier to stake a small plant than to try to fix a leaning, overgrown one.
Pest and Disease Control
Bell peppers can be targeted by a range of pests and diseases. The good news is that most problems can be managed without harsh chemicals if you catch them early.
Common Pests
Aphids: Tiny soft-bodied insects that cluster on new growth and undersides of leaves. They suck sap from plants and can weaken them. Spray them off with a strong stream of water or use an insecticidal soap spray.
Pepper Weevils: Small beetles that lay eggs inside peppers, causing them to drop early. Remove and destroy any affected fruit immediately. Row covers before flowering can prevent them.
Spider Mites: These are tiny, almost invisible pests that cause leaves to look dusty or stippled. They thrive in hot, dry conditions. Keep plants well-watered and spray with neem oil or insecticidal soap.
Hornworms: Large green caterpillars that can eat a lot of foliage quickly. Handpick them off and drop them in soapy water. They’re easy to spot because they’re big.
Thrips: Very small insects that scratch the surface of leaves and fruit, leaving silvery marks. Neem oil or spinosad spray can help.
Common Diseases
Bacterial Spot: Shows up as dark water-soaked spots on leaves and fruit. Caused by bacteria, made worse by wet weather. Use copper-based fungicide spray. Avoid working with plants when they’re wet.
Phytophthora Blight: A fungal disease that causes plants to wilt and collapse quickly. It’s caused by a water mold that thrives in waterlogged soil. Good drainage and proper spacing are the best prevention.
Powdery Mildew: A white powdery coating on leaves, usually appearing in late season. It’s common and not usually fatal. Good air circulation and neem oil spray help manage it. To prevent common issues like blossom end rot and ensure your peppers develop thick, crunchy walls, you can refer to the University of Minnesota Extension’s guide on growing peppers for professional troubleshooting
Blossom End Rot: Not actually a disease — it’s a calcium deficiency usually caused by inconsistent watering. The bottom of the pepper turns black and sunken. Keep watering consistent and make sure your soil pH is right so the plant can absorb calcium.
Prevention Is Better Than Treatment
The best way to manage pests and disease is to prevent them in the first place. Here’s how:
- Rotate your crops each year (don’t plant peppers in the same spot two years in a row)
- Keep the garden clean — remove dead leaves and plant debris
- Water at the base of plants, not on leaves
- Space plants properly for good air flow
- Check your plants every few days so you catch problems early
Harvesting Bell Peppers
This is the fun part. Knowing when and how to harvest is important — do it right and you’ll get the best flavor and keep the plant producing.
When to Harvest Green Peppers
You can harvest green bell peppers as soon as they reach full size (usually 3 to 4 inches long) and feel firm. Green peppers don’t need to be fully ripe — they’re just an earlier stage of ripeness.
When to Harvest Colored Peppers
For red, yellow, or orange peppers, you need to wait longer. After the pepper reaches full size as a green pepper, it takes another 2 to 4 weeks to fully change color. It will go through stages — you might see it start to blush or show patches of color before it’s fully ripe. Wait until the color is consistent all over.
Fully ripe colored peppers are sweeter and more nutritious than green ones. Worth the wait.
How to Harvest
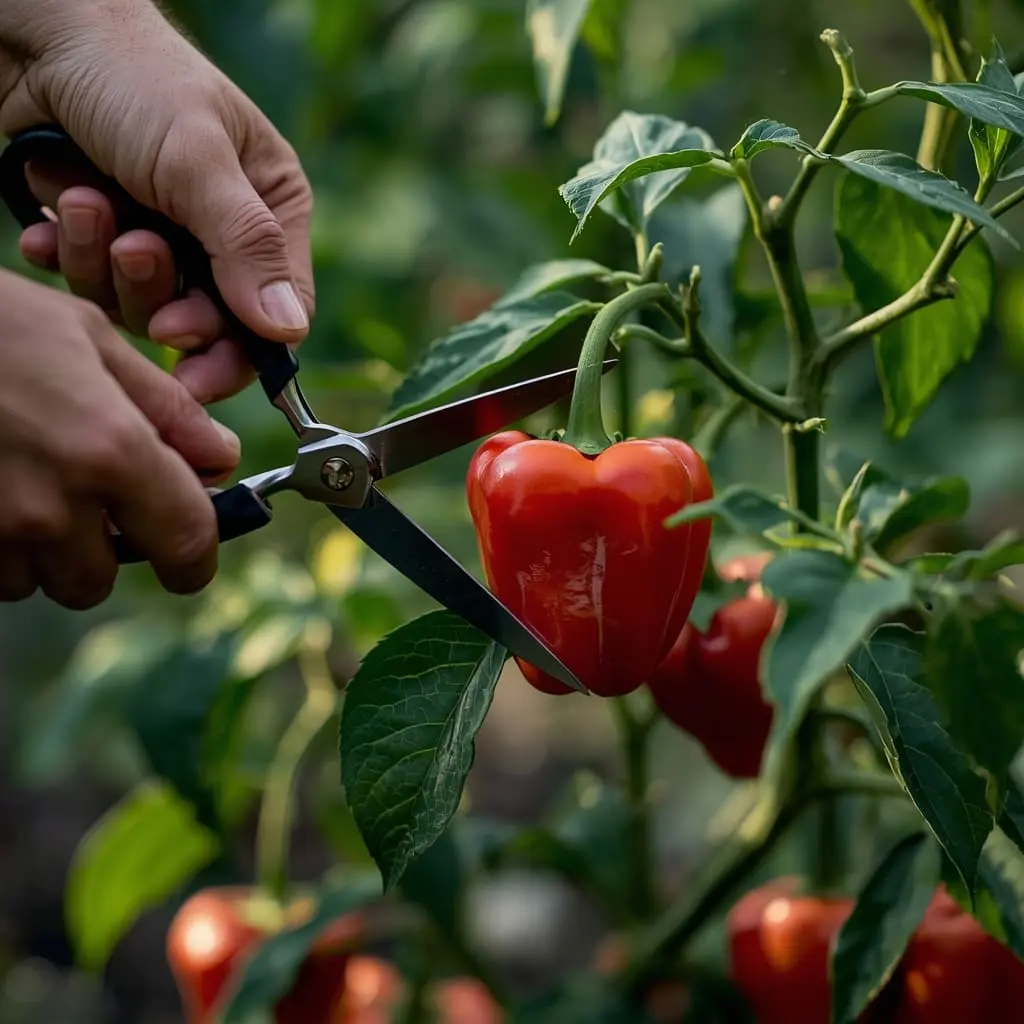
Always use a pair of sharp scissors or pruning shears to cut the pepper off the plant. Cut the stem about ½ inch above the fruit. Don’t twist or pull the pepper off — you can damage the plant and break off branches. Bell pepper planting guide tells you best time to harvest.
The More You Pick, the More You Get
This is one of the best things about peppers. The more often you harvest, the more the plant will produce. Leaving overripe peppers on the plant signals to the plant that it’s done its job and it slows down production. Pick peppers regularly to keep the plant going strong.
Storage Tips
After harvesting, here’s how to keep your peppers fresh:
In the refrigerator: Unwashed bell peppers can be kept in the vegetable drawer for up to 2 weeks. Red, yellow, and orange peppers last a bit longer than green ones because they’re fully ripe.
Freezing: Bell peppers freeze really well. Wash them, cut out the seeds and membranes, slice or chop them, and spread them on a baking sheet in the freezer for 2 hours. Once frozen, transfer to a zip-lock bag. Frozen peppers last up to 12 months and are great for cooking (they will be soft after freezing, so use them in cooked dishes, not fresh salads).
Roasting and storing in oil: Roasted bell peppers can be kept in olive oil in the fridge for about a week. They’re delicious on sandwiches and pasta. Bell pepper planting guide will make you pro farmer.
Drying: You can dry bell peppers in a food dehydrator or low oven. Dried peppers can be stored in airtight jars and used in soups, stews, and seasonings.
Tips to Increase Yield
Want more peppers from your plants? Here are practical tips that really work:
1. Start with good seeds or transplants. Quality seeds from a reputable company give you a head start. Look for varieties that are labeled as high-yield or disease-resistant.
2. Don’t rush the season. Planting too early when the soil is still cold will stunt your plants. Warm soil is everything for peppers.
3. Pinch early flowers. When your plant first gets transplanted, some gardeners recommend pinching off the first few flowers. This encourages the plant to put more energy into growing strong roots and stems before it starts fruiting. More root = more plant = more peppers later.
4. Keep nutrients coming. Feed your plants every 2 weeks with a liquid fertilizer. Don’t let the soil go completely dry between feedings.
5. Mulch your beds. A 2 to 3-inch layer of straw or wood chip mulch keeps roots cool, holds moisture, and reduces water stress.
6. Watch for pests early. A plant stressed by pests produces fewer fruits. Check the undersides of leaves regularly.
7. Space plants properly. Crowded plants compete for water and nutrients. Give each plant 18 to 24 inches of space.
8. Grow in raised beds. Raised beds warm up faster in spring, drain better, and are easier to fill with great soil. Many gardeners see 30 to 50% higher yields in raised beds compared to flat garden rows.
Common Mistakes to Avoid
Even experienced gardeners make these mistakes. Here’s what to watch out for:
Planting too early. The most common mistake. Cold soil stops growth and can kill seedlings. Wait until nighttime temps are above 55°F consistently.
Overwatering seedlings. Seedlings need moisture but drown easily. Let the top of the soil dry slightly between waterings.
Planting in poor soil. Bell peppers won’t produce well in heavy, clay-like, or nutrient-poor soil. Always amend your soil with compost before planting.
Skipping hardening off. Moving seedlings straight from indoors to outdoor sun causes transplant shock. Take a week to transition them.
Not supporting plants. Heavy pepper plants can break. Stake them early before they get too big.
Too much nitrogen. This produces lots of leaves and very few peppers. Ease up on nitrogen once flowers appear.
Ignoring pests. A few aphids can become thousands in a week. Check plants regularly and deal with pests early.
Planting in the same spot every year. This builds up soil-borne diseases. Rotate peppers to a new spot each season.
Beginner Tips
If this is your first time growing bell peppers, here are some things that will make your life much easier:
Buy a heat mat for germination. It makes seeds sprout much faster and more reliably. It’s not expensive and it’s one of the most useful tools for starting seeds indoors.
Label your plants. If you’re growing more than one variety, label them. Trust me — they all look the same as seedlings and you will forget which is which.
Keep a garden journal. Write down when you planted, what variety, what problems you ran into, and when you harvested. This makes next year so much easier.
Start small. Don’t plant 20 pepper plants your first year. Start with 3 to 5 and learn what they need. You’ll get better results and won’t feel overwhelmed.
Join a local gardening group or online forum. Other gardeners are incredibly generous with advice. Ask questions — there’s no dumb question in gardening.
Be patient. Bell peppers are slower than tomatoes and zucchini. They take their time. Don’t give up if things look slow in the beginning.
Frequently Asked Questions
From seed to first harvest, bell peppers usually take about 90 to 120 days. That includes 8 to 10 weeks of indoor seed starting, plus 70 to 90 days after transplanting for the fruit to develop. If you want to harvest red or colored peppers, add another 2 to 4 weeks on top of that, since they need time to change color after reaching full size as a green pepper.
Flower drop is one of the most common bell pepper problems, and it has a few causes. Temperatures that are too hot (above 95°F) or too cold (below 55°F) at night cause flowers to drop before they can set fruit. Inconsistent watering, too much nitrogen fertilizer, or a sudden change in conditions can also cause flowers to fall. Check your temperatures first — that’s usually the main culprit.
On average, a healthy bell pepper plant produces 6 to 10 peppers per season, sometimes more. It depends on the variety, how well you care for it, and how long your growing season is. Plants in containers tend to produce slightly less than in-ground plants. Keeping up with watering, feeding, and harvesting regularly encourages more production throughout the season.
Yes, you can — but there’s a catch. Most bell peppers sold in grocery stores are hybrid varieties, and seeds from hybrids may not grow true to the parent plant. They’ll usually still grow and produce peppers, but the fruit might look or taste a bit different. If you want predictable results, buy seeds from a seed company. Also, dry the seeds thoroughly for a week or two before planting them.
Bell peppers need consistent, deep watering — but not constant. In an average summer, watering 1 to 2 times per week in the garden is usually enough. In containers or during a heat wave, daily watering may be needed. The key word is consistent — letting the soil go completely dry and then drenching it causes blossom end rot and cracked fruit. Stick your finger an inch into the soil; if it’s dry, it’s time to water.
A balanced fertilizer like 10-10-10 or 5-10-10 works well. When the plant is young and growing leaves, a little more nitrogen is helpful. Once flowers appear, switch to a fertilizer with less nitrogen and more phosphorus and potassium to encourage fruit production. Liquid fertilizers like fish emulsion or tomato fertilizer work great because they’re absorbed quickly. Fertilize every 2 weeks throughout the growing season.
Yellow leaves can happen for several reasons. Overwatering or waterlogged soil is the most common cause — roots can’t get oxygen and the plant shows stress through yellow leaves. Nutrient deficiencies (especially nitrogen or magnesium) also cause yellowing. Sometimes it’s just the natural cycle of the plant dropping older lower leaves. Check your watering first, then look at your fertilizing schedule. If the yellowing is on new leaves at the top, it’s more likely a nutrient deficiency.
It depends on what color you want. Green bell peppers are ready when they’re firm and full-sized, usually 3 to 4 inches. For red, yellow, or orange peppers, wait until the pepper has fully changed to that color all over — not just patches. Ripe colored peppers feel a little softer than rock-hard green ones and have a sweeter smell. Use scissors to cut them off the plant rather than pulling.
No. Bell peppers are very cold-sensitive and will die if exposed to frost. Even a light frost can damage or kill plants. If a surprise cold night is in the forecast, cover your plants with a frost cloth or old bedsheets, or bring containers indoors. In the fall when the season is winding down, check your forecast regularly — one frost will end your harvest for the year.
You can, but it takes effort. Bell peppers grown indoors need strong grow lights (full-spectrum LED lights for 14 to 16 hours a day), warm temperatures, hand pollination (since there are no bees indoors to do it for you), and consistent care. It’s doable, especially with compact or mini varieties. Pollinate by gently shaking the flowers daily or using a soft brush to transfer pollen from flower to flower.
That’s blossom end rot. It looks like a dark, sunken, leathery patch on the bottom of the pepper. It’s caused by a calcium deficiency in the fruit, almost always triggered by inconsistent watering. The plant can’t move calcium to the fruit properly if the soil moisture levels are all over the place. Start watering more consistently and add a layer of mulch to help keep moisture steady. Make sure your soil pH is between 6.0 and 6.8 so the plant can actually absorb the calcium that’s available.
One Comment